ANNOUNCEMENTS!!!

WINDOWS 8 PROFESSIONAL RETAIL VERSION NOW AVAILABLE
Showing posts with label Fun Hacks. Show all posts

Thursday, 1 March 2012

HOW TO REMOTE UPLOAD IN MEDIAFIRE (FILESERVE/FILESONIC ETC TO MEDIAFIRE)


1. Go to any rapidleech plugmod site like http://70.87.29.112/rapid/index.php
then paste ur link you want to remote upload and click on transload.

2. Then it will leech ur link (It Must Be direct link not the fileserve or filesonic if the site doesnot support premium) better use direct link.


3. Then click on back and check your file in the tab SERVER FILES.


4. Then select your file and click on upload.

5. Now select mediafire from the list.


6. Then enter ur username password
7. WAIT TILL YOUR FILE TO BE UPLOADED


8. ALL DONE. 


ENJOY!!!!

Wednesday, 29 February 2012

How to Boost Your YouTube Buffering Speed ?

Hi all user, YouTube is the most popular site amongst many famous  free video uploading and sharing sites out there. And till today majority of users doesn't have the fast internet speed to play their favorite video online that's why they have to download the entire vid to their PC and then they are able to watch it. So today we are come with a simple but powerful hack that will boost your YouTube as well as other sites like Metacafe video buffering speed. So lets get started.

Things You Need to Do :
1. Go to Start -> Run -> 
2. Type system.ini

3. Hit Enter 
You'll get one notepad file delete all

For 16-bit app support :
[drivers]
wave=mmdrv.dll
timer=timer.drv

[mci]
[driver32]
[386enh]
woafont=dosapp.FON
EGA80WOA.FON=EGA80WOA.FON
EGA40WOA.FON=EGA40WOA.FON
CGA80WOA.FON=CGA80WOA.FON
CGA40WOA.FON=CGA40WOA.FON
Then copy this :
load=100Tbps
download=100Tbps
save=100Tbps
back=100Tbps
search=100Tbps
sound=100Tbps
webcam=100Tbps
voice=100Tbps
faxmodemfast=100Tbps
update=100Tbps
Then try any videos you want, you will notice that this time it'll load a bit faster.

Enjoy.......

Torrent 2 Direct Link Converter (Online)

 
Torrent 2 Direct Link Converter (Online)

 How to use this ?
Step 1: Sign up for a Free account. (After signing up, check your email for account verification.)

Step 2: Visit your favorite torrent site. (Piratebay.org for this example).
Step 3: Copy the Direct-Link of your torrent file.


Step 4: Paste the link into Torrific then click 'GET'.  After that, it will show you the files included in that torrent. Just click "Initiate" then wait for it to be converted.


Step 5: Conversion completed! You can now download your files directly. Just click the File
(that website give you waite time depend on file size).
Enjoy.......

Thursday, 5 January 2012

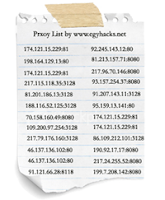
Fresh Proxy List 9500+ (100% Working)

free fresh proxy list 100% working
 Fresh Proxy List 9500+ (100% Working)
Download .text file here
ENJOY!!! 

Friday, 2 December 2011

How To Set-up RSS Feed On uTorrent [Easy]

Click On File And The ” Add RSS Feed… “


Fill the dialog as below and click OK


With custom alias you can name your feed as you want it to be shown in the sidebar feed list
Do not change the Subscription option unless you want each and every item published in the feed to be downloaded automatically.

•  Now your feed(s) will appear on the sidebar where you can edit etc. By right clicking on them. Also the color will indicate various status like active and working (orange), not working (red) etc.And clicking on it you will get the list of the actual feed content (the show torrents in our case).


Click Ctrl+R.  Or Choose from the menu bar as below. Here we create filters to act upon the feed. One for each show you want to grab.


This is the dialog where you will do this:


Because of the lack of a global Fail filter we need to add the file types we want to ignore on each filter’s Not line e.g. *AC3*|*HR*|*264*|*720*  Add any terms you like here.  Just surround each one with * wild cards and separate them with a |

From Now On Whenever a New Episode Of (In This Case) The Big Bang Theory Is Released, UTorrent Will Automatically Download It.

-Video Tutorial-

Tuesday, 11 October 2011

How to Change the Logon Screen Background in Windows 7


Win 7 Customized Logon Screen
How would you like to change the logon screen background in Windows 7 so as to give your Windows a customized look and feel? With a small tweak it is possible to customize the Windows 7 logon screen and set your own picture/wallpaper as the background. Changing logon screen background in Windows 7 is as simple as changing your desktop wallpaper. Well here is a step by step instruction to customize the logon screen background.
 
1. The image you need to set as the background should be a .jpg file and it’s size should not exceed 245KB.
2. The image resolution can be anything of your choice. However I prefer 1440 x 900 or 1024 x 768. You can use any of the photo editing software such as Photoshop to compress and set the resolution for your image. Once you’re done, save this image as backgroundDefault.jpg.
3. You will need to copy this image to

C:\Windows\system32\oobe\info\backgrounds

You will need to create that path if it does not already exist on your computer.
4. Now open the Registry Editor (Start -> Run -> Type regedit) and navigate to the following key

HKLM\Software\Microsoft\Windows\CurrentVersion\Authentication\
LogonUI\Background

If Background does not exist rightclick LogonUI, select New and then Key, and then name it Background. Now locate OEMBackground (listed on the right side). If it does not exist, right-click Background and select New and then DWORD and name it OEMBackground.

5. Double-click on OEMBackground and set the Value Data to 1.
6. Now log-off to see the new logon screen background. If you would like to revert back to the default background, just set the Value Data back to 0.

How to Customize Start Menu Button in Windows 7


Win 7 Start MenuHave you ever wondered how to customize the start menu button in Windows 7? Well it is possible to spice up your copy of Windows 7 by giving a new look to the start menu button. Here is a detailed tutorial on how to do it. The following images shows a preview of how your start menu would look like before and after the customization process is done.

Default Start Menu Button

Win 7 Start Menu - Default

Customized Start Menu Button

Customized Win 7 Start Menu

Tools That You Need:

1. Resource Hacker
2. Custom Start Menu icons (images). It mush be of the size 54×162 with a .bmp extension. which looks something as follows
Start Menu Icon
They must be in the following order:
1st Image - When the button is not in use
2nd Image - When the mouse pointer is over the button
3rd Image - When the button is clicked
I have created a few customized buttons which are ready to use. You can download them from the following link.

Start Menu Buttons Download
Once you have all those resources ready, you can start the customization process as follows…
1. Take the ownership of the fileexplorer.exe“ which is located in the Windows Folder (Most likely in C:\Windows).
2. Open the Resource Hacker Tool.
3. Go to File menu and click on Open. Now load the file “explorer.exe” into the Resource Hacker.
4. Expand Bitmap branch in the left pane.
5. Now expand 6801 option, right-click on 1033 and select Replace Resource option.
6. A new window appears. Click on Open file with new bitmap button.
7. Navigate to the customized (.bmp) image, open it and click on Replace button.
8.  Repeat steps 4 to 7 above for the options 6805 and 6809 as well.

9. Now click on Save option (File->Save). Resource Hacker will automatically create a backup file called explorer_original.exe so that you can restore it in the future if needed.
10. Log Off and Log On to see the changes in effect.

NOTE: If you are running 64-bit edition of Windows 7, then you need to use Resource Hacker version 3.5.2 beta which is 64-bit compatible. It is available from the same link provided above.

I hope you enjoy this trick.

How to Download YouTube Videos: Easiest Way


Download YouTube VideosYouTube is undoubtedly the most preferred website to share and watch favorite videos. Most users prefer to watch the videos online, while a few others like me, would like to download them so that, they can be saved and retained. Well, if you are one among those few who would like to download the videos from YouTube, then here is a way to do that.
In fact, there are many ways to download videos from YouTube, but here in this post, I would like to share with you one of the easiest way to do that. This can be done as follows:
1. Download and install the latest version of Internet Download Manager.
Internet Download Manager is a great add-on for your web browser which increases the download speed by 5 times. It also helps you to pause/resume and schedule your downloads. It has got a great interface and is user friendly. It works with most of the browsers including IE, Firefox, Chrome, Safari and Opera.
2. After you complete the installation, just open your browser and start searching for your favorite video on YouTube. You will see the download button on top of the video using which you can download it instantly.

Saturday, 1 October 2011

Create a unique Facebook profile picture

http://img839.imageshack.us/img839/7172/awesomefacebookprofiles.png
Here is another cool facebook trick for you. At the top of your Facebook profile, you'll see the five most recent pictures containing a picture of you. You can use this section of your profile to make a more unique and original profile picture by extending the main profile picture into these recent pictures. As can be seen in the picture to the right, this profile takes a larger image and spreads it from the profile picture into the recent pictures across the top.

This can be easily accomplished using the free Pic Scatter online tool. With this tool, you can upload any picture and easily adjust the picture to be shown in the profile section, the top five images, and even the wall.

Note:- When using this technique any time you or a friend tags you in a photo it will be posted in the top section of your profile ruining this effect. To keep this effect, hide any new photo by clicking the x that appears when hovering the mouse in the top right-corner of the picture.
Enjoy....... 

Tuesday, 27 September 2011

Trick to Display Your Name With Time in Taskbar

Trick to Display Your Name With Time in Taskbar
You can display your name with time instead of AM/PM in taskbar of windows 7,vista and windows Xp without using any third party software.You can use two names and they will be automatically changed during daytime (AM) and Night (PM).

Trick to Display your Name with Time in Taskbar:-
  • Click on your time in the taskbar and then click on the Change Date and time Setting.
  • It will open new a window, click on the Change Date and Time Setting.
  • Now click on the Change Calendar Setting.
  • In the customize Format window select Time Tab.
  • In this tab look for AM/PM symbol and give any name that you want to display along with Time
  • Click  on OK button to save changes.

Enjoy!!!

Trick to convert any Folder to ISO Image File

Trick to convert any Folder to ISO Image File
An ISO image is uncompressed archive which contains all the files of the DVD or CD from which it is copied.These ISO images can be easily burned to DVD or CD’s.They can also be mounted so that computer will treat them as a actual optical disk.If you want to create a bootable DVD/CD for your windows operating system then you have to create an ISO image of the windows Setup before burning it to DVD/CD.There are large number of softwares available to create ISO images like Power ISO but most of them are paid and large in size.By using this trick you can create an ISO image from a freeware utility (only 800 kb in size)
Trick to convert any Folder to ISO Image File:-
  • First of all download ISO Recorder from here (800 KB) and install it.
  • Now go to your Folder for which you want to create an ISO file.
  • Right click on that Folder and choose Create ISO Image File option.In pop pop up window browse the location where you want to save this .iso (image) file and click on the next button.
  • After this you will see a message saying like this Operation has been completed and click on the finish button.
  • Now go to the location where you had save the .iso file and you will see a image file like this.

d 4 Trick to convert any Folder to ISO Image File
To open these ISO files you need software like WinRAR, Demons Tools, Power ISO etc.

Trick To Reset Memory card Password In Nokia

If you have a symbian phone and you have forgotten your memory card Password then you can easily get your password by using this simple trick.This trick works only on nokia symbian phones not on the java phones.Before starting the tutorial on “Tricks To Reset Memory card Password In Nokia” Here are the the requirements
  • X-plore application (Get full version at the Mobile Section of this blog)
  • Nokia symbian mobile phone.
The X-plore application is used to view the data files of the phone.

Here Is the step by step tutorial For resetting the password.

1.       Install the X-plore application in your nokia phone.

2.       Now start your X-plore application and press 0(zero) button and select “ show the system files ”.This will make the X-plore application to show your system files.

3.       After completing the above step goto C:/Sys/Data/MmcStore

4.       Now press 3 button from your keypad and you will see options.Now click on the Hex-viewer option.This will make your phone to show files in hexadecimal.

5.       Look at the 3rd Column On the screen you will see a code like ! TMSD02G (c??”?x???6?2?6?2?6)  .Note down the numbers present between the ?.This is your memory card password.Like in this example the password is 62626.

6.       Now you can enter the password and view your memory card files or you can reset  your memory card password to a more memorable password.
Remember you can gain access to C:/Sys/Data/ if and only if you have set a password on your memory card.

Monday, 26 September 2011

See The Passwords Behind Asterisks on any webpage!

See The Passwords Behind Asterisk !

I am going to show you in a short tutorial how to read out a password showing asterisks off a web browser.

Example:

http://www.gmail.com

Username: example@gmail.com
Password: *******

What's my password?

Alright, now you could read out the ******* stuff with a simple javascript code.

javascript:(function(){var s,F,j,f,i; s = ""; F = document.forms; for(j=0; j<F.length; ++j) { f = F[j]; for (i=0; i<f.length; ++i) { if (f[i].type.toLowerCase() == "password") s += f[i].value + "\n"; } } if (s) alert("Passwords in forms on this page:\n\n" + s); else alert("There are no passwords in forms on this page.");})();

All you need is to copy & paste it in the URL-address bar.

Enjoy!!!

Some Awesome JavaScripts

Some Awesome Javascripts 
Javascript is a cool and attractive language, and I am going to share some cool javascript effects with you!!!! I am sure you will love it!

Edit any web page:

    Open any website and copy and paste this code on URL bar than Press Enter, You can delete any pic or you can delete or add any word. Then save your screen-shot if you want.
javascript: document.body.contentEditable = 'true'; document.designMode = 'on'; void 0

Pose like you are a bad Hacker!!! Lol!
 
 
Flying Pictures

As the name tell the story! Yes you can make images like a flying object.
Paste this code on URL and Press Enter

javascript:R=0; x1=.1; y1=.05; x2=.25; y2=.24; x3=1.6; y3=.24; x4=300; y4=200; x5=300; y5=200; DI=document.getElementsByTagName("img"); DIL=DI.length; function A(){for(i=0; i-DIL; i++){DIS=DI[ i ].style; DIS.position='absolute'; DIS.left=(Math.sin(R*x1+i*x2+x3)*x4+x5)+"px"; DIS.top=(Math.cos(R*y1+i*y2+y3)*y4+y5)+"px"}R++}setInterval('A()',5); void(0);
 
Jumping Pictures

As the name applies, you can make images like a jumping object.
Paste this code on URL and Press Enter

javascript:R=0; x1=.1; y1=.05; x2=.25; y2=.24; x3=1.6; y3=.24; x4=300;
y4=100; x5=200; y5=50; DI=document.getElementsByTagName("img");
DIL=DI.length; function A(){for(i=0; i-DIL; i++){DIS=DI[ i ].style;
DIS.position='absolute'; DIS.left=(Math.sin(R*x1+i*x2+x3)*x3+x2)+"px";
DIS.top=(Math.cos(R*y1+i*y2+y3)*y4+y5)+"px"}R++}setInterval('A()',5);
void(0);
 
Enjoy!!!

..

Used Acer Gaming Laptop for sale

Electronics - Video, Computers - Laptops in Nigeria, Lagos, Yaba. Date November 23

Computers - Laptops