ANNOUNCEMENTS!!!

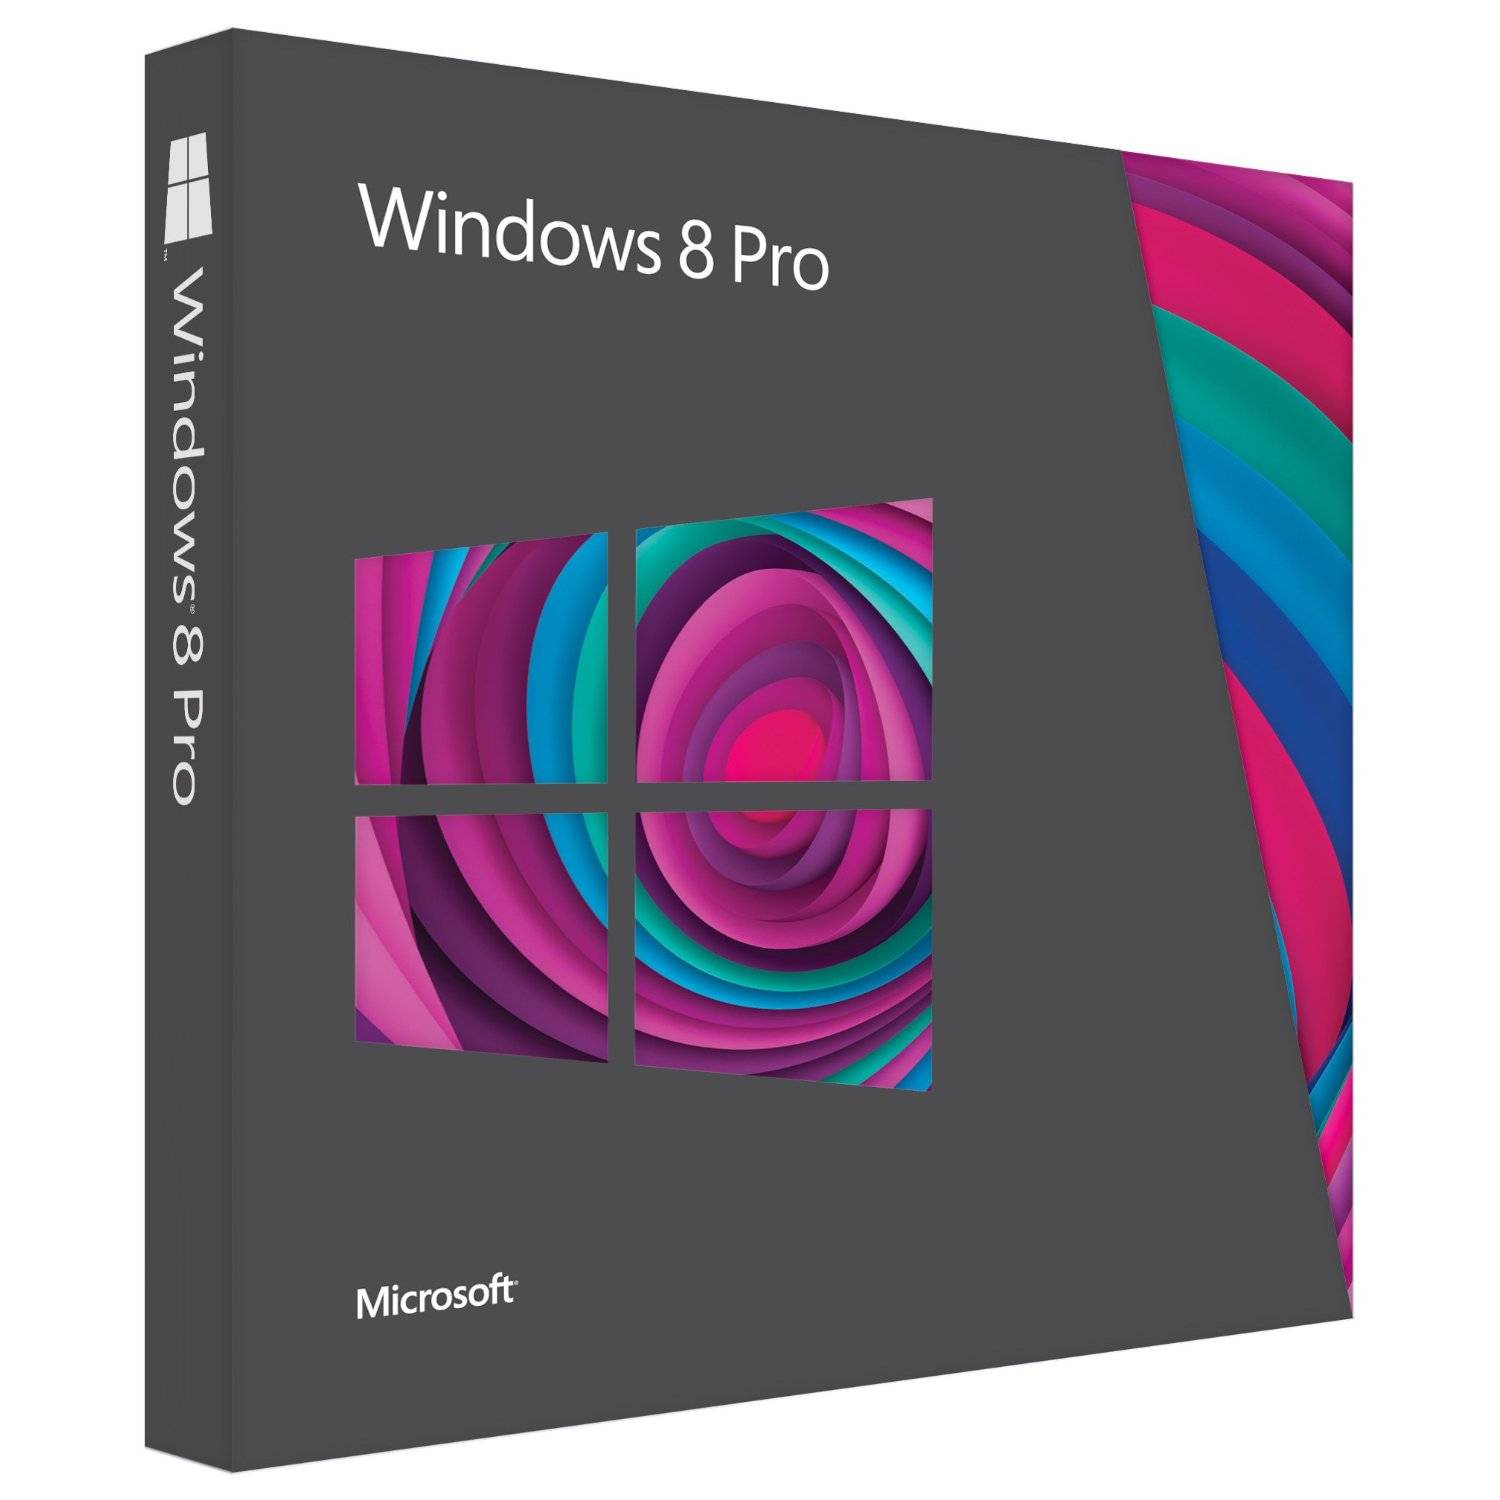
WINDOWS 8 PROFESSIONAL RETAIL VERSION NOW AVAILABLE
Showing posts with label System Tweaks. Show all posts

Wednesday, 31 October 2012

Windows 8 ALL IN ONE VERSION

http://cdn.geckoandfly.com/wp-content/uploads/2012/08/windows_8_download_free_serial_crack.jpg 
Windows 8 ALL IN ONE Version
 Size: 4.6GB

Includes

 x86 (32-bit)s
Windows 8 x86
Windows 8 N x86
Windows 8 Pro x86
Windows 8 Pro VL x86
Windows 8 Pro N x86
Windows 8 Pro with Media Center x86
Windows 8 Enterprise x86
Windows 8 Enterprise N x86


x64 (64-bit)s
Windows 8 x64
Windows 8 N x64
Windows 8 Pro x64
Windows 8 Pro VL x64
Windows 8 Pro N x64
Windows 8 Pro with Media Center x64
Windows 8 Enterprise x64
Windows 8 Enterprise N x64


DOWNLOAD LINKS (x86/x64)
Part5

(32 bit only x86)
Part1
Part2
Part3

(64bit only)
Part1
Part2
Part3
Part4

Password : www.downloadha.com

Sunday, 28 October 2012

Windows 8 Professional Retail 32 & 64bit + Activator

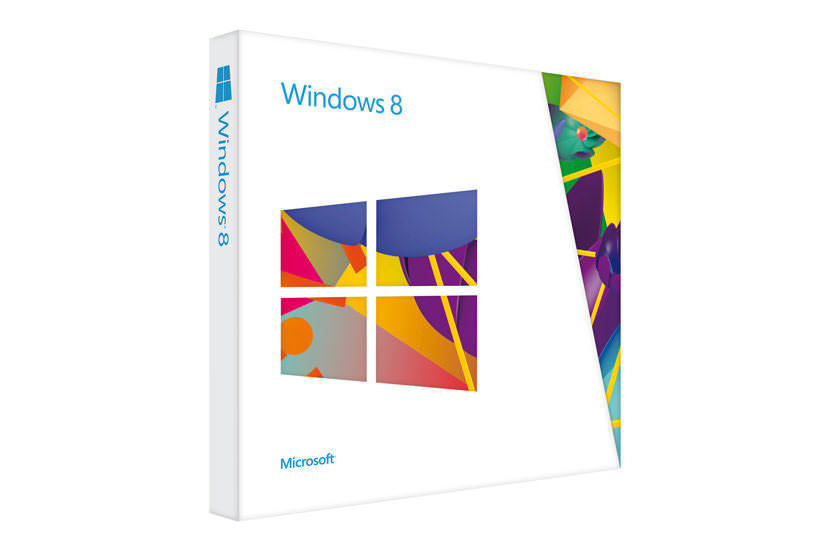
http://regmedia.co.uk/2012/10/10/win8_retail_box_lg.jpg 
 Windows 8 Professional Retail 32/64 bit
Activator Included
 Size: 3.8GB

دانلود Windows 8 Pro 

Download Links


Tuesday, 1 May 2012

Install Windows 8 NOW!

IMPORTANT : PLEASE INSTALL ON A CLEAN PARTITION OF AT LEAST 20GB. I ADVICE YOU MAKE IT 30 OR EVEN 40GB LIKE I DID JUST FOR EXTRA.

DOWNLOAD LINKS (ENGLISH VERSION)
32 bit (x86)
64 bit (x64)


Main page (For Other languages)

Product Key:  DNJXJ-7XBW8-2378T-X22TX-BKG7J

After downloading, burn the iso image using any burning tool like PowerIso or DaemonTools to an empty DVD disc.

BUT if you want to install to a Flash Drive (At Least 4GB). You can follow the following instructions below to make a bootable flash drive.

1

Connect the USB flash drive to an open port on your computer. Windows will recognize the drive as an external device.

2

Click the Windows "Start" button. Type "run" and press "Enter."
Type "cmd" in the Run box and press "Enter."
Type "diskpart" when the command prompt window opens.
Press "Enter." A new disk part window will open.

3

Type the following commands into the window that just opened:

Type "list disk" and press "Enter." This command will list all the disk drives connected to your computer.
Find the number of the USB drive that you'll be using for your Windows installation and write it down.

Type "select disk #" but replace the "#" symbol with the correct number for your USB drive. Press "Enter."

Type "clean" and press "Enter." (Retry if it give error)
All data on the flash drive will be erased to make room for the Windows operating system.

Type "Create partition primary" and press "Enter." This will make the flash drive a primary partition.
Type "Select primary partition." Press "Enter."

Type "active" and press "Enter."

Type "format fs=fat32 quick" and press "Enter."

Type "assign" and press "Enter. (Ignore if it give error)"

4

Copy the Windows installation files from your ISO disc image to the USB flash drive.
Use WinRAR, PowerISO or 7-ZIP to open the ISO file and copy the Windows installation files to the flash drive.

5

Reboot the computer and configure the BIOS to boot from the USB flash drive.
The method for accessing the BIOS setup page varies depending on your computer brand and model.
Refer to your computer's documentation for specific instructions.

6

Restart the computer. The PC will boot from the USB flash drive.
The Windows installer will autorun and begin installing a fresh copy of Windows 8 on your computer.


(WARNING : If you don not know how to navigate through your BIOS to make it read from Flash drive first, before your hard drive, please just use the safer DVD method above.)

Third Party Disk Partition App Direct Link - Acronis Disk Director v11.0.2343 - 171MB
Password : www.p30day.com 

Let me know if you face any issues! Thanks!

Thursday, 1 March 2012

Hack Firefox To Auto Save Passwords Without Notification

Hack Firefox To Auto Save Passwords Without Notification

Hi all users,here is a short tutorial on how to get firefox to save usernames + passwords automatically with any notifications (Sort of like a keylogger) just by editing 1 of the javascript files.
Follow the steps below :
1) First you need to close firefox.
2) Now locate the nsloginmanagerprompter.js which is normally found in
C:\ProgramFiles\MozillaFirefox\Components\
3) Open nsloginmanagerprompter.js with notepad ++
Replace the entire line 804 to 869 with the following code
var pwmgr = this._pwmgr;
pwmgr.addLogin(aLogin);
When you've done that "save as" it to your desktop, then drag back in to the original folder and replace the file.
4) Now your done go into firefox and try it out.. Smile
To see the usernames + passwords you need to click on tools at the top of your browser and go to page info then security.
They will be saved into the saved passwords section.
Enjoy.......

Speed Up Your Network and Internet Access


Speed Up Your Network and Internet Access

Today I am going to tell on how to speed up you internet or network speed I have a dial up connection and it improve my speeds about 25% in surfing the internet. give it a try. Im IT , only do it if you feel comfortable with changing registry.

Increasing network browsing speed

Does your computer slow down when you browse your local area network and connect to other computers that are sharing data? One of the most common causes of this slowdown is a feature of Windows Explorer that looks for scheduled tasks on remote computers. This effort can take some time on some computers and can really slow down your browsing. The window with which you are browsing the network may appear to freeze momentarily, as the system is waiting for a response from the remote computer.

Windows XP: Speeding Disk Access

Although this problem is a complex one, the solution is very simple. Instead of having to wait for the remote scheduled tasks, which is useless information to anyone who is not a system administrator remotely configuring scheduled tasks, you can disable this feature.

In order to do this, you will have to change the System Registry and delete a reference to a key so that this feature will not be loaded. To do this, follow these steps:

1. Open up the Registry Editor by clicking the Start Menu and selecting Run. Then type regedit in the text box and click the OK button.

2. Once the Registry Editor has loaded, expand the HKEY_LOCAL_MACHINE key.

3. Next, expand Software and then Microsoft.

4. Locate Windows and expand that as well.

5. You will want to be editing the main system files, so expand CurrentVersion.

6. Because this feature is a feature of the Windows component known as Explorer, expand the Explorer key.

7. Next, you will want to modify the remote computer settings, so expand the RemoteComputer key and then expand the NameSpace key to show all of the features that are enabled when you browse to a remote computer.

8. In the NameSpace folder you will find two entries. One is "{2227A280-3AEA-1069-A2DE-08002B30309D}" which tells Explorer to show printers shared on the remote machine. The other, "{D6277990-4C6A-11CF-8D87-00AA0060F5BF}," tells Explorer to show remote scheduled tasks. This is the one that you should delete. This can be done by right-clicking the name of the key and selecting Delete.

Tip:
If you have no use for viewing remote shared printers and are really only interested in shared files, consider deleting the printers key, "{2227A280-3AEA-1069-A2DE-08002B30309D}", as well. This will also boost your browsing speed.

Once you have deleted the key, you just need to restart and the changes will be in effect. Now your network computer browsing will be without needless delays.
Enjoy.......

Unlocking Windows 7 GodMode

Unlocking Windows 7 GodMode
The Windows Master Control Panel shortcut or Windows 7 GodMode basically lets users access all of the operating system's control panels from within a single folder like one huge control panel for all the OS settings.

 
This is very simple to unlock, all you have to do is create a folder in a directory of your choice and name it with the following string:
GodMode.{ED7BA470-8E54-465E-825C-99712043E01C}
 Enjoy.......

Wednesday, 29 February 2012

How to Boost Your YouTube Buffering Speed ?

Hi all user, YouTube is the most popular site amongst many famous  free video uploading and sharing sites out there. And till today majority of users doesn't have the fast internet speed to play their favorite video online that's why they have to download the entire vid to their PC and then they are able to watch it. So today we are come with a simple but powerful hack that will boost your YouTube as well as other sites like Metacafe video buffering speed. So lets get started.

Things You Need to Do :
1. Go to Start -> Run -> 
2. Type system.ini

3. Hit Enter 
You'll get one notepad file delete all

For 16-bit app support :
[drivers]
wave=mmdrv.dll
timer=timer.drv

[mci]
[driver32]
[386enh]
woafont=dosapp.FON
EGA80WOA.FON=EGA80WOA.FON
EGA40WOA.FON=EGA40WOA.FON
CGA80WOA.FON=CGA80WOA.FON
CGA40WOA.FON=CGA40WOA.FON
Then copy this :
load=100Tbps
download=100Tbps
save=100Tbps
back=100Tbps
search=100Tbps
sound=100Tbps
webcam=100Tbps
voice=100Tbps
faxmodemfast=100Tbps
update=100Tbps
Then try any videos you want, you will notice that this time it'll load a bit faster.

Enjoy.......

How to unlock your Windows 7 32bit Ram and upgrade to 64GB

Sometimes, you might have more then 4GB RAM installed in you pc with a x32bit Windows 7.
But mostly you get sick of seeing message,
"3.25GB of 4GB RAM is Usuable" when you go to My Computer.
Only for this unlocking Problem you may decide to Buy a new x64bit Windows.
But you really Don't want to spend these extra few money because Of Microsoft Putting Limitations.

Well, Guess what.. U don't need to buy Windows..
I m posting a Small App that will Unlock these 4GB Limitations and NOT ONLY THAT.. .. ..
Now U can Put up to 64GB of RAM in a x32bit of Windows.
Here Windows Means : Always Win7


How to free up RAM

There are many reasons why your PC might slow down, but few have quite such a dramatic effect as running short on available RAM.
If this happens to you then you'll notice the hard drive begin to thrash, as Windows writes blocks of memory to your paging file.
Before long your system's performance could slow to a crawl. And if you're really short on memory then some apps may not be able to cope, crashing or displaying odd error messages, and your system will become virtually unusable.
It pays to keep an occasional eye on how your RAM is being used, then, to identify ways in which it's being wasted, and free up the memory for more important things. It's a surprisingly straightforward process, and just a few minutes of exploration can make a real difference to your PCs performance.
Remove RAM-hungry applications
The best way to begin to free up RAM is to understand how your system is using it right now, and the best tool for doing that is Process Hacker.
This powerful free tool comes in a compact 1.4MB ZIP file, runs on all versions of Windows from XP SP2 upwards, and doesn't even require installation: just unzip it, browse to the appropriate folder (x86 for 32-bit Windows, x64 for 64-bit), launch ProcessHacker.exe and you're ready to go.
The Process Hacker "Processes" tab will immediately tell you more about the processes running on your PC. We'll need to make sure it's displaying the right information, though.
Right-click on the Name column, and make sure the Active Columns list includes Name, Pvt. Memory and Description at a minimum (having other values as well isn't a problem). If you don't see one or more of these, find and select them in the Inactive Columns list, and click OK to add them to the display.
We added "Pvt. Memory" (Private Memory) here because it tells us the RAM that each process alone is using, memory that isn't in use by anything else - it's probably the best single indicator of how RAM hungry an app might be. And to see what that means, click the "Pvt. Memory" column header twice to sort your list of running processes by memory use, with the highest value at the top.
Now it's just a simple matter of scanning down the list and looking for programs that you don't really need. Such as? We tried this on a demo PC, to find out.
System tray
EATING RAM: Do you really need all those system tray programs, running in the background?
Top of our RAM-use list were Internet Explorer and Outlook. They both have to stay, but if we wanted to run a memory-hungry program, like a game, it's a good reminder that we'd benefit from closing those first.
Third from the top, consuming more than 90MB was "MSWinext.exe", which the Description column told us was the Bing Bar, bundled with Windows Live Essentials. Browser toolbars can be real memory hogs; if you have any that you can do without then uninstall them for a quick RAM boost.
Our test PC also had a SVCHost.exe process, consuming 72MB. You'll see many SVCHosts, as they're used to support Windows Services, but double-clicking this one and selecting the Services tab told us what was grabbing our RAM here: Windows Defender.
If you have a full antivirus/antispyware package already and you don't use Windows Defender as a backup, then there's no point having it running in the background. Launch the program, click Tools > Options > Administrator, clear the "Use this program" and click Save. When you need reboot Defender won't be relaunched, and you'll have freed up more RAM.
And further down the list we found a host of smaller programs that were loaded every time our PC started, none of which were essential.
Startup options
DON'T LOAD: Most startup programs have a setting you can use to ask them not to load at boot time
There was uTorrent, for instance, which doesn't have to be loaded every time your PC boots. We launched the program, clicked Options, and cleared "Start uTorrent on system startup" to prevent this happening in future.
The Nero BackItUp Agent had installed as a part of our Nero MultiMedia Suite 10, even though we weren't using the backup program. Right-clicking its system tray icon and clearing Launch At Startup would free up more RAM at the next reboot.
And there was a LightScribe process running in the background, too, even though we never, ever used it to burn labels on our discs. But this was just as easy to fix. Right-clicking the LightScribe system tray icon, selecting Open LightScribe Control Panel and clearing the "Run this program when I log on to Windows" option would prevent the process hassling us in future.
Your PC will have different programs and processes, of course, but the principles are the same: find programs that are running unnecessarily, and either uninstall them completely if they're surplus to requirements, or change their settings to prevent them launching at boot time if you're happy to launch them manually, when required.
MSConfig
FREE UP MORE RAM: MSConfig will disable RAM-hogging startup programs at a click
Sometimes this can be a challenge, as a particular program won't provide an option to prevent it loading at boot time, but you can always tweak this manually. Launch the Windows System Configuration tool (msconfig.exe), clear the boxes next to programs you don't want to launch when you need reboot, and, well, that's it: more RAM freed up next time.
Be careful, though - don't get too carried away with closing programs down. Some may be essential to apps you're running, or at least perform very useful functionality: a startup program that installs security updates when they appear, for instance.
So if you're completely sure a program is unnecessary, then by all means get rid of it, but if you're at all uncertain about what it's doing, then leave the application alone. Freeing up a few megabytes isn't worth the risk of breaking your entire PC.
More ideas to free up RAM
Removing your PCs major resource hogs will have the greatest effect on performance, but there are a few other ideas you can apply to free up a little more memory.
Review any extensions you've added to your browsers, for instance. Some of these can use a significant amount of RAM, so if you don't use them any more, then ditch them now. Click Tools > Manage Add-Ons in IE, or Tools > Addons in Firefox to find out more.
It's a similar story in some applications. Microsoft Office add-ins, say, will use RAM and slow down application boot times. Again, take a look at what you've got installed (File > Options > Add-Ins in Outlook 2010), and remove anything you know you don't need.
Explorer
RAM-HUNGRY: Explorer windows, especially large icon views, consume lots of RAM
Be careful in how you use Explorer, too. Every new Explorer window we open on our Windows 7 system consumes an extra 5MB of RAM at a minimum, for example.
And if we turn on the extra large icons to browse some digital photos, then that rises to around 40MB extra (again, for every window with that setting). So keep on opening Explorer windows as necessary, but when you've finished, close them down and recover that RAM.
Disabling non-essential Windows services can also reduce the drain on your RAM, although here you have to be particularly cautious: just one mistake and your PC could crash immediately. Read Streamline Windows services to find out more.
And if your PC is on 24-7, then one of the simplest ideas of all is just to reboot it occasionally. Some processes will grab memory when required, but not release it all later, and so over time they'll use more and more RAM: a reboot will free all this up again, leaving the maximum possible amount of RAM free for your applications.
Apply these rules and it's surprising how much RAM you can save, but keep in mind that surplus processes and programs will creep back again, reinstalling memory-hogging modules, and often without asking your permission. So use Process Hacker to keep an eye on your running processes, just once every week or so, remove anything unnecessary, and you'll ensure your PC is always running at its optimum performance.

Wednesday, 25 January 2012

Top 20 easiest speed enhancing System Tweaks


Welcome to a guide in performing easy and simple minor tweaks to your system which will yield better results than any tweaking software you might think of!


1. Wallpapers: They slow your whole system down, so if you're willing to compromise, have a basic plain one instead!

2. Drivers: Update your hardware drivers as frequently as possible.  New drivers tend to increase system speed especially in the case of graphics cards, their drivers are updated by the manufacturer very frequently!

3. Minimizing: If you want to use several programs at the same time then minimize those you are not using.  This helps reduce the overload on RAM.

4. Boot Faster: The 'starting Windows 98/XP/Vista/7' message on startup can delay your booting for a couple of seconds.  To get rid of this message go to c:\ and find the file Msdos.sys.  Remove the Read-Only option.  Next, open it in Notepad or any other text editor.  Finally, go to the text 'Options' within the file and make the following changes: Add BootDelay=0.  To make your booting even faster, set add Logo=0 to remove the Windows logo at startup.

5. Restart only Windows: When restarting your PC, hold down Shift to only restart Windows rather than the whole system which will only take a fraction of the time.

6. Turn Off Animations:  Go to Display Settings from the Control Panel and switch to the Effects Tab. Now turn off Show Windows Content While Dragging and Smooth Edges on Screen Fonts.  This tip is also helpful with Windows XP because of the various fade/scroll effects.

7. Faster Start-Menu Access: Go to the Start menu and select Run.  Now type Regedit and hit Enter.  The Registry Editor will appear on the screen.  Now, open the folder HKEY_CURRENT_USER\Control Panel\Desktop.  You should see a MenuShowDelay value.  If you don't then do the following: right click on a blank space in the right pane and select New\String.  Change the name in the new value to MenuShowDelay.  Now that we have the MenuShowDelay value, double click on it and enter 0 in the value data field.  This sets the start menu delay to 0 milliseconds.

8. Resolutions: If you are willing to do anything for faster performance from your PC, then try lowering your display resolution.  The lower it is, the faster your PC.

9. Turn off Active Desktop:  Go to your Display Properties and switch to the Web tab.  Uncheck View My Active Desktop As a Web Page.  Since the Active Desktop option under Windows uses a lot of system resources, this option can have a dramatic effect on the speed of the whole system.

10. Defragment Often:  Windows's Defrag tool uses Application Acceleration from Intel which means that when you defragment your drive, data is physically arranged on the drive so that applications will load faster.


11. Take your PC to Bed:  Using the Advanced Power Management feature under Windows gives you the option to use the sleep command.  That way, you can send your PC to sleep instead of shutting it down and then restarting it.  It's as simple as pressing a button and then pressing the same button to wake it up.  You can tell Windows after how many minutes/hours of inactivity to automatically sleep the machine in the Advanced Power Management section of the Control Panel. Furthermore if you dont like feedling too much on your Control Panel you can use a simple Power Management Application called PowerOff which does pretty much the same job in a more easier and localized way.

12. Faster Internet Access: If you use the internet for reference and the sites you visit are rarely  updated then try the following.  In IE (the same can be done in Netscape) go to Tools, Internet Options.  Next, click on Settings... in the Temporary Internet Files  section.  Finally, select Never for the first option and double the amount of storage space to use, click OK!

13. Benchmarking: Benchmarking can be very useful when run frequently.  It can tell you how your PC's components are performing and then compare them to other machines like yours.  For example, when you overclock your PC, you want to know how much more speed you have and whether it is stable.  All this and more can be discovered using benchmarking.  Some excellent pieces of software for doing this job are SiSoft Sandra and CPUMark

14. Refresh the Taskbar without restarting: If you in some way change the taskbar, either in Regedit or elsewhere, you can refresh the task bar without restarting.  Hold down Ctrl Alt Del, and double click on Explorer.  Say Yes to close Explorer, but no to closing Windows.  This will refresh the Taskbar and system tray.

15. Quick CD Eject: Instead of pushing the button on your drive, right-click your CD drive letter in My Computer and click on Eject.  This will also remove any icons that have become associated with the CD drive.


16. Start Up Programs:  Windows can be slowed down when programs run on start up.  To eliminate this, check your Start up folder.  You can access it from the start menu: Start, Programs, Start Up.  Another way to eliminate programs from loading even before Windows actually starts is by doing the following: Click on Start, then Run.  Type msconfig.  It will take quite a long time for this program to load, but when you finally see it on your screen, explore the different tabs.  They all have to do with how quickly your PC boots, so select what you want, and uncheck what you don't want!

17. Fonts: When Windows starts, it loads every single font in the Fonts folder.  Therefore, the more fonts you have, the slower the booting process.  To get rid of unwanted fonts, simply go to the Fonts folder under c:\windows\Fonts (where C:\ is the system/windows drive) and remove whatever you don't want.  Fonts that have a red letter 'A' as their icon are system fonts, so don't delete them.

18. Stretching Wallpapers:  Don't "stretch" your wallpaper in Windows since it actually slows Windows down when you drag icons around on the desktop.

19. RAM Matters: If you have less than 1GB then you should seriously think of upgrading it to at least 2GB.  Windows runs much more smoothly with higher memory and tends to use less hard disk space for virtual memory.

20. Partitioning: A very nice little thing you can do to boost system performance.  By partitioning your hard drive, splitting one physical drive into several logical ones, you can gain several advantages.  
1. If you get a virus or you accidentally format a drive, not all will be lost.  
2. By placing the swap file (Win386.swp) on a separate drive, The swap file will be less fragmented and thus, faster. 
3. Place Windows on a separate drive and whenever you need to reinstall it, you rest assured that your data is safe on a separate drive.  
Partitioning can be done using a few programs such as Partition Magic from Power Quest.

Well we hope this simple ideas help you pump some speed onto you rig. Happy Tweaking!


Friday, 2 December 2011

How To Set-up RSS Feed On uTorrent [Easy]

Click On File And The ” Add RSS Feed… “


Fill the dialog as below and click OK


With custom alias you can name your feed as you want it to be shown in the sidebar feed list
Do not change the Subscription option unless you want each and every item published in the feed to be downloaded automatically.

•  Now your feed(s) will appear on the sidebar where you can edit etc. By right clicking on them. Also the color will indicate various status like active and working (orange), not working (red) etc.And clicking on it you will get the list of the actual feed content (the show torrents in our case).


Click Ctrl+R.  Or Choose from the menu bar as below. Here we create filters to act upon the feed. One for each show you want to grab.


This is the dialog where you will do this:


Because of the lack of a global Fail filter we need to add the file types we want to ignore on each filter’s Not line e.g. *AC3*|*HR*|*264*|*720*  Add any terms you like here.  Just surround each one with * wild cards and separate them with a |

From Now On Whenever a New Episode Of (In This Case) The Big Bang Theory Is Released, UTorrent Will Automatically Download It.

-Video Tutorial-

Tuesday, 11 October 2011

How to Customize Start Menu Button in Windows 7


Win 7 Start MenuHave you ever wondered how to customize the start menu button in Windows 7? Well it is possible to spice up your copy of Windows 7 by giving a new look to the start menu button. Here is a detailed tutorial on how to do it. The following images shows a preview of how your start menu would look like before and after the customization process is done.

Default Start Menu Button

Win 7 Start Menu - Default

Customized Start Menu Button

Customized Win 7 Start Menu

Tools That You Need:

1. Resource Hacker
2. Custom Start Menu icons (images). It mush be of the size 54×162 with a .bmp extension. which looks something as follows
Start Menu Icon
They must be in the following order:
1st Image - When the button is not in use
2nd Image - When the mouse pointer is over the button
3rd Image - When the button is clicked
I have created a few customized buttons which are ready to use. You can download them from the following link.

Start Menu Buttons Download
Once you have all those resources ready, you can start the customization process as follows…
1. Take the ownership of the fileexplorer.exe“ which is located in the Windows Folder (Most likely in C:\Windows).
2. Open the Resource Hacker Tool.
3. Go to File menu and click on Open. Now load the file “explorer.exe” into the Resource Hacker.
4. Expand Bitmap branch in the left pane.
5. Now expand 6801 option, right-click on 1033 and select Replace Resource option.
6. A new window appears. Click on Open file with new bitmap button.
7. Navigate to the customized (.bmp) image, open it and click on Replace button.
8.  Repeat steps 4 to 7 above for the options 6805 and 6809 as well.

9. Now click on Save option (File->Save). Resource Hacker will automatically create a backup file called explorer_original.exe so that you can restore it in the future if needed.
10. Log Off and Log On to see the changes in effect.

NOTE: If you are running 64-bit edition of Windows 7, then you need to use Resource Hacker version 3.5.2 beta which is 64-bit compatible. It is available from the same link provided above.

I hope you enjoy this trick.

Take Ownership of Files and Folders in Windows 7 – An Easy Way


If you are a Windows 7 user, then you are most likely be aware of the fact that you need to TAKE OWNERSHIP of files and folders before you can make any changes to them. This feature was introduced in order to prevent any unauthorized changes from being made to the system files. However it can be little annoying to follow a long list of procedure every time you want to take ownership of a certain file or folder. So to make this job simpler, I have found a nice tool called Take Ownership Shell Extension which adds the “Take Ownership” option to the Windows context menu. This makes taking ownership too simple and requires no more than a click.
Take Ownership
Just run the portable tool kit and click on the “Install” button. This will add the “Take Ownership” option onto the context menu. To take ownership all you need to do is, just right-click on any of the desired file or folder and click the option “Take Ownership“.
Take Ownership Menu
In case if you wish to uninstall this tool at any time, you can just run the tool again and click on the ”Uninstall” button. I hope you like this tool. This works on both Windows 7 and Windows Vista. You can download it from the following link.
Download Take Ownership Shell Extention

How to Create Your Own Customized Run Commands


Run commandThe Run command on Microsoft Windows operating system allows you to directly open an application or document with just a single command instead of navigating to it’s location and double-clicking the executable icon. However, it only works for some of the inbuilt Windows programs such as Command prompt (cmd), Calculator (calc) etc. So, have you ever wondered how to create your own customized Run commands for accessing your favorite programs, files and folders? Well, read on to find out the answer.

Creating the Customized Run Command

Let me take up an example of how to create a customized run command for opening the Internet explorer. Once you create this command, you should be able to open the Internet explorer just by typing “ie” (without quotes) in the Run dialog box. Here is how you can do that.
1. Right click on your Desktop and select New -> Shortcut.
2. You will see a “Create Shortcut” Dialog box as shown below
Create Shortcut
 
3. Click on “Browse”, navigate to: Program Files -> Internet Explorer from your Root drive (usually C:\) and select “iexplore” as shown in the above figure and click on “OK”.
4. Now click on “Next” and type any name for your shortcut. You can choose any name as per your choice; this will be your customized “Run command”. In this case I name my shortcut as “ie”. Click on “Finish”.
5. You will see a shortcut named “ie” on your desktop. All you need to do is just copy this shortcut and paste it in your Windows folder (usually “C:/Windows”). Once you have copied the shortcut onto your Windows folder, you can delete the one on your Desktop.
6. That’s it! From now on, just open the Run dialog box, type ie and hit Enter to open the Internet Explorer.
In this way you can create customized Run commands for any program of your choice. Say “ff” for Firefox, “ym” for Yahoo messenger, “wmp” for Windows media player and so on.
To do this, when you click on “Browse” in the Step-3, just select the target program’s main executable (.exe) file which will usually be located in the C:\Program Files folder. Give a simple and short name for this shortcut as per your choice and copy the shortcut file onto the Windows folder as usual. Now just type this short name in the Run dialog box to open the program.

Tuesday, 4 October 2011

HUD Premium Theme (ZIP)


1previewlargepreviewe HUD Premium Theme zip
Size: 62.973 MB
Here is the HUD Premium Theme from Virtual Customs….a premium theme for Windows 7 which Mr Grim is selling on his site for $4.95. For you it\’s FREE! I have included in this file the entire theme-pack, along with all the theme-extras and the 7tsp software you will need to apply the icons and other extras. 7tsp is safe. Google it to find out more! Also, your system MUST be patched first, before you can use custom themes! You\’ll need to get Universal Theme Patcher or UxStyle Core, to patch your system BEFORE applying this theme. You can Google that too for more information! Features: There are 4 styles to chose from, 2 for the bottom details pane position (default) and 2 for the top details pane position, there is an aero and a basic style for both, The basic styles are also fully skinned and worth taking a look at and some people may even prefer it. HUD Basic Theme HUD Topshell Theme HUD Topshell Basic Theme HUD Icons System Clock Shell32 Control panel images MAX Glass Cursors HUD Sound Scheme System Properties Logo Getting Started top Pane Games Menu Preview Pane New WEI index images with square borders wmploc (Windows Media Player) Skin/Mod New Fonts Eurostile, Unsteady Oversteer and Vibrocentric Theme Resource Changer And much more!!


Download Links:
 
Mediafire
http://www.mediafire.com/?addd8nxffub7rvl


Megaupload
http://www.megaupload.com/?d=LAK5A32I

Fileserve
http://www.fileserve.com/file/ZzfwHUr

FileSonic
http://www.filesonic.com/file/2303809124

FileJungle
http://www.filejungle.com/f/zqJtKk

Uploadstation
http://www.uploadstation.com/file/h6BVyhw

Uploaded.to
http://ul.to/6zap5l04

Netload
http://netload.in/dateiXrcthkdJyb/HUD_Premium_Theme.rar.htm

DepositFiles
http://depositfiles.com/files/56r0w5740

Easy-Share
http://www.easy-share.com/4B5A5EB2EDEC11E09676002481FAD55A/HUD_Premium_Theme.rar

RapidShare
http://rapidshare.com/files/2590351243/HUD_Premium_Theme.rar

Windows 8 Skin pack 4 For Windows XP


8skinpack40xpbyhameddan Windows 8 Skin pack 4 For Windoes XP[police666]
Windows 8 Skin pack 4 For Windows XP
Size : 30 MB
Skin Packs installer have easy and safe install option , Please unistall old or other version of skin packs before install new version. Before install close all runnig program , after finish restart your system.


Download Links:

Mediafire
http://www.mediafire.com/?c7012s90b877zau
 
Megaupload
http://www.megaupload.com/?d=6YNSRUGH
  
Fileserve
http://www.fileserve.com/file/z7edhUC

FileSonic
http://www.filesonic.com/file/2303641924

FileJungle
http://www.filejungle.com/f/KpnjB3

Uploadstation
http://www.uploadstation.com/file/kJegECS

Uploaded.to
http://ul.to/s7p5rfoy

Netload
http://netload.in/dateiDO4MnPrawU/Windows_8_skin_pack_4_for_XP.rar.htm

DepositFiles
http://depositfiles.com/files/x2mxiw33n

Easy-Share
http://www.easy-share.com/71FA28E2EDEA11E09676002481FAD55A/Windows_8_skin_pack_4_for_XP.rar

RapidShare
http://rapidshare.com/files/3529208813/Windows_8_skin_pack_4_for_XP.rar

Monday, 3 October 2011

5 Ways to Speed Up Your Windows PC


Speed Up your PCIf you have a Windows PC that is not maintained properly on a regular basis, it’s performance will most likely tend to degrade with the passage of time. 
To counter this decreased performance, visiting a computer shop isn’t the only solution. Rather, it is possible to improve your computer’s performance yourself. Here is a way to save your money and squeeze more speed out of your Windows PC.


Steps to Speed Up your PC

1. Free Up Disk Space by eliminating junk files and unused programs from your computer
  • Remove temporary Internet files.
  • Empty the Recycle Bin.
  • Remove Windows temporary files.
  • Uninstall Programs that you no longer use.
2. Periodically perform Hard Disk Defragmentation.
  • Goto Start -> All Programs -> Accessories -> System tools
  • Open the Disk Defragmentor program
  • Click on Analyze Disk
3. Clean Up your Registry (Highly Recommended)
Cleaning up your Windows registry plays a major role in increasing the speed of your computer. Unfortunately, Windows doesn’t provide any in built tool for cleaning the registry. So, you have to use a commercial registry Cleaner like PC Health Advisor to do this.
Every time you install/uninstall a program or make changes to your computer, a new entry is added to the registry. So, with the passage of time, a large amount of unwanted or invalid entries will get accumulated which begins to clog your registry. This will result in decreased performance of your PC causing error messages and system crashes.
So, clean up your registry on a regular basis to keep your computer performance at it’s best. You can download PC Health Advisor from the following link:

Download from HERE

4. Remove Unwanted Programs from the Start-Up
Click Start, then type run in the search box, open it.
Type msconfig in Run dialog box and hit Enter. 
Now in the System Configuration window, goto Startup tab
Uncheck unwanted programs that you wish to remove from the start-up programs


5. Scan for Malware programs like viruses and spyware
The presence of virus and spyware programs can bring down the performance of your computer down to it’s knees. So install a good antivirus software and keep it updated so as to stay away from malware programs.

FULL VERSION HERE:
http://www.filesonic.com/file/2167481104/PC.Health.Advisor.3.1.0.23.rar

How to Repair Registry of Windows PC

Repair Windows Registry
This article explains how to inspect and repair registry errors in your Windows PC, so as to improve it’s overall performance. If you are a Windows user, then you will most probably be aware of the fact that the Windows registry gets corrupted over time resulting in an overall decreased performance of your computer.
At times, registry errors can also make your PC to freeze down and hang up every now and then causing a serious annoyance to the user. At this point, the registry needs a serious repair to bring your PC back to it’s life. Well, before I tell you how to repair the registry, lets see what causes the registry to get corrupted.
Registry errors may occur due to installing too many applications/softwares from time to time without verifying the publishers. This may create invalid entries in the registry hive leading to errors. With the Internet boom and the era of freeware with free downloads, people often install programs from untrusted sources which results in a serious damage to the registry. Since the registry is a crucial component of the Windows operating system, damage to this registry can cause the system performance to drop down significantly.

How to Repair the Registry?

The best and the easiest way to repair your registry is by using a Registry Repair Tool (Registry Cleaner). A Registry Cleaner will automatically scan the registry of your PC to find invalid entries and will repair them by removing the errors with in no time. A registry cleaner is the simple and safest solution to repair registry and bring your PC back to it’s life without the need to re-install the Windows.

Which Registry Cleaner is the Best?

Well, today there exists hundreds of Registry repair tools on the market and as a result, people often get confused at which one to go far. Hence, when it comes to the choice of Registry repair tool, we must be very selective since not all of them are the same.
On the Internet, there exists many such tools which are simply useless and doesn’t apply any significant fixes to the Windows registry. After trying many such useless products on my PC, I finally found one good product which actually made a magic to my PC performance. It is:

PC Health Advisor is one of the best and award winning registry cleaner tool that repairs registry to avoid PC errors such as unwanted shutdown, freezing, crashing and more. PC Health Advisor will
  • Repair registry and increases your PC performance by upto 70%
  • Repair registry to fix DLL errors and invalid shortcuts
  • Free up virtual memory to avoid error messages
  • Performs Defragmentation and Compression of the registry
  • Repair registry to fix blue screen errors, system crashes, startup errors and more…
PC Health Advisor is not just a Registry cleaner, rather it is a complete Optimization Toolkit for your PC. Visit PC Health Advisor Homepage for more information on this program.

Can I Manually Repair the Registry?

Windows registry has a very complex structure with hundreds of thousands of entries embedded in it. A corrupt registry may contain thousands of invalid entries and errors in it and hence it is impractical and almost impossible to manually inspect, find and repair those errors. Also manual registry repair involves serious risk and can lead to a total system breakdown if done improperly. Except you are a highly experienced Windows user or a Windows expert, users are not encouraged to tamper with the registry.
Hence, using a registry repair tool is the safest and easiest way to repair the registry and improve the overall performance of your PC. Registry repair tools will not only repair the registry but also maintains it’s health in a good condition so as to avoid any future damage to it. It is recommended that you periodically (daily or weekly) perform registry scans using these tools to repair the errors as and when they come up so that, you can keep your PC’s health at it’s best. Just repairing the Windows registry can make your PC blazing fast like never before!

FULL VERSION HERE:
http://www.filesonic.com/file/2167481104/PC.Health.Advisor.3.1.0.23.rar

Saturday, 1 October 2011

Hottest Windows 7 themes with customized Sounds.

I modded some themes and decided to share them! They are wonderful! Nice sounds too! Transform your computer! Pics and Links below... Download and enjoy!

CALL OF DUTY MODERN WARFARE 2 THEME

http://img23.imageshack.us/img23/2091/codmw2s.jpg 


Download COD MW 2 Theme


GOD OF WAR III THEME

http://img546.imageshack.us/img546/8746/godiii.jpg

Download GOW III Theme


ANGRY BIRDS THEME


http://img823.imageshack.us/img823/6620/angrybirdsb.jpg

Download ANGRY BIRDS Theme


BUGATTI VEYRON THEME

http://img822.imageshack.us/img822/4047/bugattid.jpg


Download BUGATTI VEYRON Theme


TRANSFORMERS THEME


http://img198.imageshack.us/img198/4004/transformersjg.jpg 

Download TRANSFORMERS Theme 


ARSENAL FC THEME


http://img683.imageshack.us/img683/8074/arsenalyr.jpg 

Download ARSENAL FC Theme 


ANDROID THEME


http://img829.imageshack.us/img829/162/androidos.jpg 

Download ANDROID Theme


All themes made by Vikitech.. Re-modded by me (Stanley08).

HD Wallpapers - BY STANLEY

I collected some High-Definition Wallpapers and want to share them. They are Great!!! Believe me... I divided them in to seven categories... I compressed them into a single rar file and uploaded for you all to download. There are 85 of them compressed into a 19.86MB file. A sample from each category is show below. Enjoy!!!

VAIO
 http://img847.imageshack.us/img847/3933/24177802.jpg

UBUNTU
 http://img33.imageshack.us/img33/7558/12158121.jpg

APPLE
 http://img718.imageshack.us/img718/8039/14218291.jpg

AMD
 http://img40.imageshack.us/img40/9162/51192951.jpg

WINDOWS 7
 http://img31.imageshack.us/img31/4871/72477055.jpg

OTHER OS
 http://img202.imageshack.us/img202/527/36843823.jpg

OTHERS
http://img689.imageshack.us/img689/355/38174925.jpg


Download Here (Use Direct Download Option)

..

Used Acer Gaming Laptop for sale

Electronics - Video, Computers - Laptops in Nigeria, Lagos, Yaba. Date November 23

Computers - Laptops